The Spare-USB Safety Net: Build a Windows Recovery Drive This Weekend
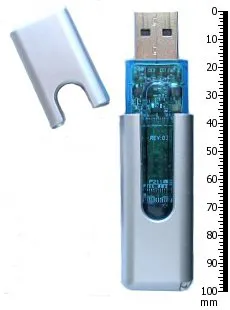
Photo: Dori, Public domain, via Wikimedia Commons
Most UK homes have a drawer with a few USB sticks in it: one from a conference, one from an old camera, one that came free with a broadband router. One of those could become a small insurance policy for your PC. A Windows recovery drive is a bootable USB stick that can help you repair Windows, run system restore, or get to troubleshooting tools when the normal desktop will not appear.
It is not a full backup. It is not a magic wand. But when a Windows update goes wrong on a Sunday evening, or a laptop refuses to start before an important deadline, it is far better than staring at a black screen and phoning someone in a panic.
Why a recovery USB beats a panic call
When Windows will not start, the usual advice is to press this, hold that, and hope. A recovery drive gives you a known starting point. You can boot from it, open the Windows recovery environment, and try startup repair, system restore, or a reset. It can also help you get to Command Prompt if you are comfortable copying files, or at least confirm whether the drive is recognised at all.
The other benefit is psychological. Knowing you have a recovery stick in the cupboard makes you less likely to ignore update prompts or put off a backup. It is the same reason people keep a torch in the car: you may never need it, but you are calmer when you do.
What you need — probably already in a drawer
You need a USB flash drive with at least 16GB of space, although 32GB is a safer bet for modern Windows 11 builds. It will be wiped completely, so do not use the stick with your only copies of family photos. Label it clearly before you start, or use a stick you do not mind erasing.
You also need a Windows PC that is currently working, an internet connection, and about 20 minutes. If you already have the USB stick, the cost is nothing. If you need to buy one, a basic 32GB drive from a supermarket or online retailer is usually under £10. That is a small price for a tool that can rescue a PC.
Make it in about 20 minutes
Plug in the USB stick. Open the Start menu and search for Recovery Drive. Windows will offer to create a recovery drive. Leave the box ticked if it offers to back up system files to the drive — it takes a little longer but makes the drive more useful. Follow the prompts, choose the USB drive, and confirm that you understand it will be erased.
Windows will format the stick and copy the recovery tools. Do not unplug it while this is happening. When it finishes, you will have a bootable drive. Eject it properly, label it with a marker, and put it somewhere you will remember. A kitchen drawer is fine. A loft is not.
Label it and store it sensibly
Write something like Windows Recovery 2026 on the stick or its case. If you have more than one PC, note which machine it was made for. Recovery drives are not always interchangeable between different Windows versions, and a stick made on a Windows 11 PC may not help an older machine in every situation. Keep it away from heat and damp, and do not use it as everyday storage.
What to keep with it
A recovery drive is more useful if you keep a few things nearby. A note of your Microsoft account email is helpful, because you may need it to sign in. If your PC uses BitLocker encryption, keep a copy of the recovery key somewhere separate from the PC — not on the same USB stick. A list of important programs you use can also help you rebuild things later.
More importantly, the recovery drive is not a substitute for backing up documents, photos, and anything else you would hate to lose. Keep those in two places: perhaps an external drive and a cloud service. The recovery drive helps you fix Windows; it does not restore your files unless you have backed them up separately.
How it helps when Windows will not start
If the PC fails to boot, switch it off, plug in the recovery drive, and switch it on again. You may need to press a key such as F12, F2, or Esc during start-up to choose the USB drive. The exact key depends on the manufacturer, so check the screen or the manual if you are unsure.
Once the recovery environment loads, you will see options such as Continue, Troubleshoot, and Turn off your PC. Under Troubleshoot, you will find tools like Startup Repair, System Restore, and Reset this PC. Startup Repair tries to fix boot problems automatically. System Restore rolls Windows back to an earlier point without deleting your documents. Reset this PC reinstalls Windows and can keep or remove your files, depending on the option you choose.
If you need to rescue files, the Command Prompt option can be used to copy folders to an external drive, but it is not the friendliest tool. If you are not confident, stop there and get help rather than risking the wrong command. The recovery drive has still done its job by giving you options.
Test it once, then forget it
You do not need to boot from the drive every month. But it is worth checking once that the PC recognises it and that you can reach the recovery menu. Do this on a day when you are not rushed. Then put it away and get on with your life. The point is not to become a Windows expert; the point is to have a calm next step if things go wrong.
A spare USB stick, 20 minutes, and a marker pen. That is a very small amount of effort for a bit of peace of mind in a UK home where the PC holds the family photos, the household budget, and someone’s coursework. Build it before you need it.